
If your goal is to build strength, in one way or another, you have probably run into a portion of an exercise that you just can’t get past. No matter what you do, through human effort, you are unable to succeed and as a result, you’re unable to become stronger. As strength levels vary through normal exercise range of motion, many lifters fail at their “sticking point” – the portion of the range or motion where the weight feels the heaviest. Generally, we are strongest near the lockout of the joint and weaker near the bottom due to leverage disadvantage.
Utilizing a strategy called “accommodating resistance” could very well be what you need to bust through your sticking point and increase your strength as it allows you to maximally stimulate muscle through the entire range of motion and safely overreach during the eccentric phase of the lift.
There are 3 points of an exercise where accommodating resistance could be used:
- When the weight gets harder to lift towards the end of the exercise.
- When the weight gets harder to lift at the beginning of the exercise.
- When the weight gets harder towards the mid-point in the exercise.
Based on the exercise, the two most popular types or tools needed to utilize accommodating resistance are bands and chains. Selecting the proper type and tension of band or weight/length/size of chain setup is necessary to get the most out of it.
Here are the most popular exercises to use accommodating resistance with and how to use them:
Squats (with Chains)
To set up the chains, begin by looping the leader chain over the sleeves of the bar. The heavy chain should be attached using a snap hook. Adjust the length of the lead chain so that a few links are still on the floor at the top of the movement.
Begin by stepping under the bar and placing it across the back of the shoulders. Squeeze your shoulder blades together and rotate your elbows forward, attempting to bend the bar across your shoulders. Remove the bar from the rack, creating a tight arch in your lower back, and step back into position. Place your feet wide for more emphasis on the back, glutes, adductors and hamstrings. Keep your head facing forward.
With your back, shoulders and core tight, push your knees and butt out, and begin your descent. Sit back with your hips as much as possible. Ideally, your shins should be perpendicular to the ground. Lower bar position necessitates a greater torso lean to keep the bar over the heels. Continue until you break parallel, which is defined as the crease of the hip being in line with the top of the knee.
Keeping the weight on your heels and pushing your feet and knees out, drive upward as you lead the movement with your head. Continue upward, maintaining tightness head to toe, until you have returned to the starting position.
Bench Press (with Bands)
Load the bar to an appropriate weight for your training. Attach short bands to the end of the bar, anchoring them on heavy dumbbells that will not move.
Lay on the bench with your feet flat on the ground, driving through the hips. Your back should be arched, and your shoulder blades retracted. Take a pronated grip, covering the rings on the bar.
Remove the bar from the rack, holding the weight above your chest with your arms extended. This will be your starting position.
Lower the bar to the sternum by flexing the elbows. Maintain control and do not bounce the bar off your chest. Your lats should stay tight and elbows slightly drawn in.
After touching your torso with the bar, extend the elbows to return the bar to the starting position.
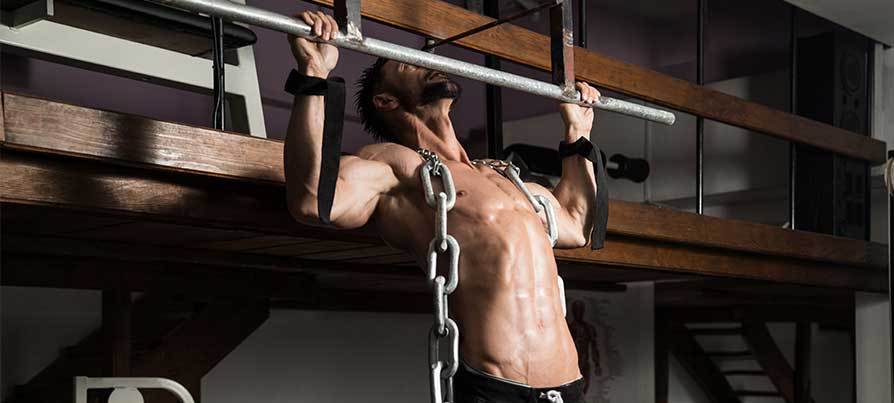
Weighted Pull-Ups (with Chains)
Drape a proper length chain around your neck and shoulders.
Grab the pull-up bar with the palms facing forward using the prescribed grip.
As you have both arms extended in front of you holding the bar at the chosen grip width, bring your torso back around 30 degrees or so while creating a curvature on your lower back and sticking your chest out. This is your starting position.
Pull your torso up until your chin rises above the bar.
Lower your torso back to the starting position when your arms are fully extended and the lats are fully stretched.
Banded Good Mornings (with Band)
Using a 41-inch band (approximately), stand on one end, slightly spreading your feet. Bend at the hips to loop the end of the band behind your neck. This will be your starting position.
Keeping your legs straight, extend through the hips to come to a near vertical position.
Ensure that you do not round your back as you go down back to the starting position.

BY JOHN PORTER JR.
MUSCLETECH AMBASSADOR